Recipes

Navette Bread
In a large bowl mix the sugar and softened butter. Stir until you get a homogeneous yellowish sand texture. Add the eggs one at a time then add the chosen flavoring. Work all the ingredients with your fingertips, adding the flour gradually. Divide the dough into several parts and roll each piece on a floured surface. Cut each roll into even slices and shape them by pinching the ends to give them the “Navette” shape which forms a little ship. Set the cookies on a baking sheet or a baking mat With a knife, score each “Navette” in the middle in the longitudinal direction. Bake for 15-20 minutes at 200°C
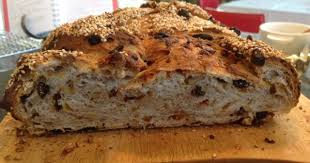
Apricot Raisin bread
straight dough method: add all the ingredient in a dough mixer with cold water. mix 5 mn in a 1st speed and 8 mn 2nd speed. l et rest 30 mn. cut 450gr dough and shape into a round ball. keep rest again for 30-45 mn and shape to desirate form. bake a 220 mn in deck oven foe 30mn

Hot Cross Buns
small quantities of up to 12 dozen buns can be mixed in a 20-quart planetary mixer or small spiral mixer. Stand mixers can mix up to 2 dozen buns. Place the final dough flour in the mixing bowl, add the soft butter, and mix just until the butter is dispersed. Add the eggs, sugar, salt, and allspice and mix them all together. Next, add the sponge. Mix on first speed for about 3 minutes until everything is thoroughly combined. Turn the mixer to second speed and mix for about 3 minutes. Strong gluten is not the goal of this mix, but enough dough develop- ment is necessary so that there is sufficient strength to lift the fruits and butter (combined, these are a considerable weight in the dough). When a moder- ate gluten development has been achieved, add the currants and diced peel. Mix until these are evenly distributed throughout the dough. Desired dough temperature: 26℃ bulk fermentation: 1 hour, with a light fold after 30 minutes. dividing and shaping: If using a 36-part dough divider, weigh off 4 presses weighing 2,7kg each. If dividing by hand, cut the dough into 80gr pieces. Round the pieces well, and place them on sheet pans in an even configuration. Cover the trays of buns with a sheet of plastic to prevent crusting on the surface. final fermentation: About 1 hour at 25℃
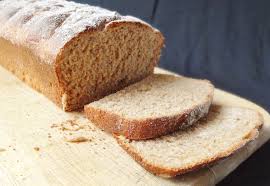
Honey Spelt Flour Bread
Place all the ingredients except the pâte fermentée in a spiral mixer. Mix on first speed for 3 minutes in order to incorporate the ingredients. As the dough is coming together, add the pâte fermentée in chunks. If necessary, correct the hydration by adding water or flour in small amounts. Finish mixing on second speed for 3 minutes. The dough should have good body and supple strength at this point. Mix 30 to 60 seconds longer if the dough seems to lack adequate strength. Desired dough temperature: 24℃ Bulk fermentation: 2 hours. folding: Fold the dough after 1 hour of bulk fermentation. dividing and shaping: Divide the dough into 900gr pieces (or larger, as desired). Preshape into rounds. When sufficiently relaxed, shape into round or oval loaves. Place them either into floured ban- netons or between folds of floured baker’s linen, and cover with plastic. The bread can also be baked in loaf pans or shaped into rolls. final fermentation: About 1 hour at 24℃ Baking: Place the risen loaves on the loading conveyor or peel. Slash as desired. Presteam the oven, load the bread, and steam again. Bake in a 450°F oven, opening the vents once the bread shows color, in or- der to finish the bake in a drying oven. Round loaves scaled at 900gr will bake in approximately 38 minutes. The honey contributes color to the bread, so if the loaves are darkening too quickly, lower the oven temperature by 220℃
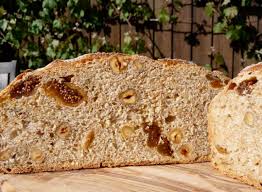
Hazelnut & Fig Bread
mixing: Add all the ingredients except the hazel- nuts and figs to the mixing bowl; the fennel seeds and rosemary can go in at the outset. In a spiral mixer, mix on first speed for 3 minutes in order to incorporate the ingredients thoroughly. The dough consistency should be moderately loose. Turn the mixer to second speed and mix for about 3 minutes more, until a moderately strong gluten development has been achieved. Add the hazelnuts and figs (ei- ther chop the figs or leave them whole, but in either case remove the hard nub of the stem before adding them to the dough), and mix on first speed just until the nuts and figs are thoroughly incorporated. Desired dough temperature: 24℃ bulk fermentation: 2 hours. 3. foldding: Fold the dough once, after 1 hour. 4. dividing and shaping: Divide the dough into 450-900gr pieces (or make rolls of about 80gr). Preshape lightly into rounds and place on a lightly floured work surface, seams up. Cover the rounds with plastic. When the dough has relaxed sufficiently, shape it into tight round or oval loaves. Place the loaves in floured bannetons and cover with baker’s linen and plastic. fInal fermentation: 1 to 11⁄2 hours at 24℃ Baking: With normal steam, 250℃. The figs will contribute a lot to the bread coloring, particularly if they have been chopped; therefore, lower the temperature by about 0℃ after 20 minutes. Loaves weighing 900gr will bake in about 40 minutes, with round loaves taking slightly longer than oval ones.
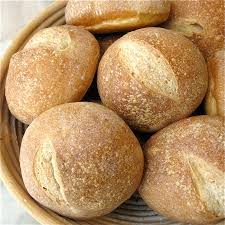
Hard Rolls
soften the yeast in a little water. Fresh yeast: mix with about 2 times its weight in water, or more. Ideal water temperature: 38 ° C Active dry yeast: Mix with approximately 4 times its weight in water. Ideal water temperature: 40 ° C Mix the remaining ingredients, including the rest of the water, in the mixturebowl. Add the dissolved yeast, taking care not to let it come in contact with the salt. Mix with a smooth and developed dough.

Gressini
mixing: For large-scale production of grissini (50 dozen or more), a full-sized spiral mixer can be used. For smaller quantities (3 to 24 dozen), a small spi- ral mixer or 20- to 30-quart planetary mixer works well. Place all the ingredients in the mixing bowl. In a planetary-style mixer, mix on first speed until the ingredients are incorporated, about 3 minutes. The dough should be of medium consistency. Turn the mixer to second speed and mix for another 4 or 5 minutes, to a moderate gluten development. Desired dough temperature: 24℃ bulk fermentation: 1 hour. dividing and shaping: If using a 36-part dough divider, divide the dough into 2 pieces weighing 1.36 kg each. If scaling the bread sticks indi- vidually, divide the dough into portions. Let the divided pieces rest on a lightly floured work surface, covered with plastic, for about 10 to 15 min- utes. Roll or stretch the pieces, trying to keep an even dimension along the length, to 15to 25 cm long. Before transferring to baking sheets, the individual bread sticks can be rolled in a tray of fine semolina if desired; this adds a bit of texture to the taste. An alternative means of dividing the dough is to press it into a flat rectangle on a floured bench and cut it into thin strips with a pizza wheel. BaKing: By the time the bread sticks have been divided, they can be baked right away with no fur- ther proofing. Bake at 180℃ for about 20 minutes, or until golden brown. Once cool, the bread sticks can be stored in airtight containers for up to 5 days.

biscuit caramel
Mix in the order. Soften butter butter and the sugar brown sugar Add whole egg one by one Add the salted butter caramel, the glucose, the flour, the powder of almond, the baking powder Add the cream, the cream vanilla powder and mixed Carambars. Spread in a Flexipat sheet of 56 x 36 cm, height 2 cm, then bake at 170°C for 12 to 15 minutes. Cool and reserve for assembly.

Garlic Bread
roated the garlic in over for 45mn at 160℃ mixing: Add all the ingredients to the mixing bowl, including the garlic. In a spiral mixer, mix on first speed for 3 minutes, adjusting the hydration as necessary to achieve a dough of medium consistency. Mix on second speed for approximately 3 minutes more, to a moderate gluten development. Desired dough temperature: 24℃ bulk fermentation: 1 to 2 hours. folding: If the bulk fermentation lasts 2 hours, fold after 1 hour. No folds are needed if the dough ferments only 1 hour. dividing and shaping: Divide the dough into 450-900gr pieces; shape round or oval. Tasty rolls can be made as well. final fermenTaTion: 1 to 11⁄2 hours at 24℃ baking: With normal steam, 250℃ for 40 to 45 minutes
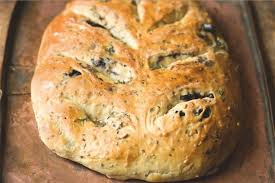
Fougasse
mixing: Add all the ingredients to the mixing bowl except the pâte fermentée, the olives, and the olive oil. For production of 20 pounds of fougasses or fewer, a small spiral mixer or 20-quart planetary mixer works well. In a planetary-type mixer, mix on first speed for 3 minutes in order to incorporate the ingredients. As the dough is coming together, add the pâte fermentée in chunks. If necessary, correct the hydration by adding water or flour in small amounts. The dough should be of medium consistency at this point. Turn the mixer to second speed and begin drizzling in the olive oil. Mix on second speed for 5 to 6 minutes until the dough has moderate gluten development. Add the pitted olives and mix on first speed just until they are evenly incorporated. In a planetary mixer, as opposed to a spiral mixer, it is a more dif- ficult and lengthy process to add ingredients at theend of a mix, such as the olives in the present case. If it takes too long to incorporate them, the olives will break apart and the dough will take on an unpleasant purplish hue. Here is a technique that can help: Once the dough has been fully mixed and it is time to add the olives, pull the dough away from the hook, creating an opening in the center of the dough. Pour about one-third of the olives into this opening, then turn on the mixer. The olives, rather than just smearing around the outside of the bowl, will be incorporated from the inside outward. After 20 or 30 seconds, turn off the mixer and again pull the dough away from the hook, creating another opening. Pour half the remaining olives into the opening and turn the mixer on once more. Do this a third time, add- ing the remaining olives, and mix until the olives have been evenly mixed into the dough. The desired dough temperature is 24℃ bulk fermentation: 2 hours. folding: Fold the dough once, after 1 hour ofbulk fermentation. dividing and shaping: Divide the dough into 450gr pieces. Round lightly, place on a floured work surface with the seams down. plastic. Let the dough relax for about 20 minutes. When sufficiently relaxed, use a rolling pin to flatten the dough into an oval shape. final fermentation: About 1 hour at 24℃ baking: When the fougasse has risen, the final shaping occurs. Pick up the dough and stretch it gen- tly so that it is about half again as long as it was. Now, shape it into a long triangle with a base about half the length of the height. Next, using a pizza wheel or a paring knife, cut several diagonal slices into the dough, as in illustration A at left. Now stretch the dough some more, so the cuts open, as in illustra- tion B. Transfer the fougasse to a loading conveyor

Focassia
Soften the yeast in a little of the water. Fresh yeast: Mix with about 2 times its weight in water, or more. Ideal water temperature: 38°C. Active dry yeast: Mix with about 4 times its weight in water. Ideal water temperature: 40°C. Combine the remaining ingredients, including the rest of the water, in the mixing bowl. Add the dissolved yeast, taking care not to let it come in contact with the salt. Mix to a smooth, developed dough. bake at 220℃ for 20mn
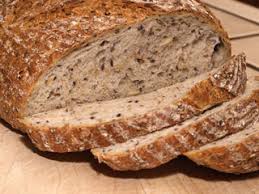
Five Grain Bread
mixing: Place all the ingredients in the mixing bowl, including the soaker. In a spiral mixer, mix on first speed for 3 minutes in order to incorporate the ingredients thoroughly. The dough should have a medium consistency. Turn the mixer to second speed and mix for 3 to 31⁄2 minutes, until the gluten net- work has been fairly well developed. Desired dough temperature: 76°F. Bulk fermentation 2 hours (or overnight retarding). folding: Fold the dough once, after 1 hour. dividing and shaping: Divide the dough into 450-900gr pieces (or make rolls with smaller pieces). Preshape lightly into rounds and place on a lightly floured work surface, seams up. Cover the rounds with plastic. When the dough has relaxed sufficiently, shape it into tight round or oval loaves. Place the loaves in floured bannetons and cover with baker’s linen and plastic. final fermentation: 1 to 1 1⁄2 hours at about 24℃. Baking: With normal steam, 250℃ Although there are no raisins or other sweeteners in the bread, the eggs and oil contribute color, so the oven may need to be lowered by 220℃ partway through the bake. Loaves scaled at 900gr will take ap- proximately 40 minutes to bake, with round loaves taking slightly longer than oblong ones.
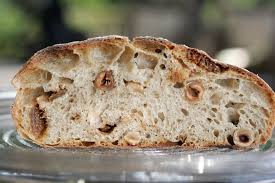
Fig Hazelnut Bread
Combine all the flours and the water and mix just until combined. Let stand 30 minutes (autolyse). Add the starter and salt. Mix at low speed 5–8 minutes to develop the dough. Remove the dough from the mixer to a worktable. Add the figs and nuts and knead in by hand until evenly distributed in the dough. Fermentation Ferment at 24°C until almost double in bulk, about 8 hours. Makeup and Proofing Scale at 750 gr. Make up into bâtard loaves Proof until almost double in bulk, about 3–4 hours. Baking 218°C with steam, 40–45 minutes
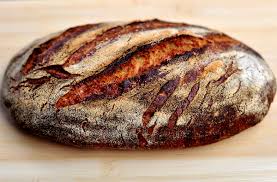
Durum Bread
mixing: Add all the ingredients, including the sourdough to the mixing bowl. In a spiral mixer, mix on first speed for 3 minutes in order to incorporate the ingredients. Correct the dough consistency as necessary. Turn the mixer to second speed and mix for another 21⁄2 to 3 minutes. The dough should be of medium consistency, but with perceptible dough strength and gluten development. Desired dough temperature: 24℃ Bulk fermentation: 1 1⁄2 hours. folding: Fold the dough after 45 minutes of bulk fermentation. dividing and shaping: Divide the dough into 450-900gr pieces (or make rolls with smaller pieces). Preshape lightly into rounds and place on a lightly floured work surface, seams up. Cover the rounds with plastic. When the dough has relaxed sufficiently (10 to 20 minutes), shape it into tight round or oval loaves. For a variation, the top of the loaves can be pressed into a damp cloth and then into a tray of raw sesame seeds. Place the loaves into floured bannetons or on lightly floured baker’s linen and cover with plastic. final fermentation: Approximately 1 to 11⁄4 hours at 24℃. Baking: Invert the risen loaves onto the loading conveyor or peel. Score the loaves as desired. Presteam the oven, load the bread, and steam again. Bake at 460°F. Open the oven vents after the loaves show color, in order to finish the bake in a drying oven. Loaves scaled at 900gr will bake in 35 to 40 minutes.

Danish Dough
croissant dough method Modified straight paste method Develop dough 3-4 minutes at second speed. Rest in the retarder 30 minutes . fold with the butter. Give 2 double turns

Croissant eclair
Combine 150 g of strong white flour with the yeast and 200 g of milk. Add 250 g of plain flour. Leave to ferment until the flour starts to appear cracked (approximately 15 minutes). Add 600 g of plain flour, salt, sugar, 350 g cold milk and 100 g of butter. Knead at speed 1 for 3 minutes, then at speed 2 for 6 minutes. Shape into a ball and leave to rise in a proofing cabinet at 20 - 23°C for one hour. Knock down the dough and chill. Give one double turn followed by a single turn. Rest the dough then roll out to a thickness of 2.5 mm. cut strip of 11cm x 2,5cm and place on eclair silpain Brush twice with beaten egg yolk. Bake in the oven at 175°C for 17 minutes.

Croissant Lenôtre
Making the croissant dough We usually do this part in the evening. Combine the dough ingredients and knead for 3 minutes, at low to medium speed, until the dough comes together and you’ve reached the stage of low to moderate gluten development. You do not want too much gluten development because you will struggle with the dough fighting back during laminating. Shape the dough like a disc, not a ball, before you refrigerate it, so it will be easier to roll it into a square shape the following day. Place the disc on a plate, cover with clingfilm and leave in the fridge overnight. Laminating the dough Cut the cold butter (directly from the fridge) lengthwise into 1,25 cm thick slabs. Arrange the pieces of butter on waxed paper to form a square of about 15 cm x 15 cm. Cover the butter with another layer of waxed paper and with a rolling pin pound butter until it’s about 19 cm x 19 cm. Trim / straighten the edges of the butter and put the trimmings on top of the square. Now pound lightly until you have a final square of 17 cm x 17 cm. Wrap in paper and refrigerate the butter slab until needed. make the dough out of the fridge. With a rolling pin roll out the dough disc into a 26 cm x 26 cm square. Try to get the square as perfect as possible and with an even thickness. Get the slab of butter from the fridge. Place the dough square so one of the sides of the square is facing you and place the butter slab on it with a 45 degree angle to the dough so a point of the butter square is facing you. Fold a flap of dough over the butter, so the point of the dough reaches the center of the butter. Do the same with the three other flaps. The edges of the dough flaps should slightly overlap to fully enclose the butter. With the palm of your hand lightly press the edges to seal the seams. Now the dough with the sealed in butter needs to be rolled out. With a lightly floured rolling pin start rolling out, on a lightly flour dusted surface, the dough to a rectangle of 20 x 60 cm. Start rolling from the center of the dough towards the edges, and not from one side of the dough all the way to the other side. This technique helps you to keep the dough at an even thickness. You can also rotate your dough 180 degrees to keep it more even, because you tend to use more pressure when rolling away from you than towards yourself. You can use these techniques during all the rolling steps of this recipe. Aim at lengthening the dough instead of making it wider and try to keep all edges as straight as possible. Fold the dough letter style, cover with clingfilm and refrigerate for 30 minutes (fold one third of the dough on top of itself and then fold the other side over it). Repeat the rolling and folding two more times (ending up with 27 layers of butter in total), each time rolling until the dough is about 20 cm x 60 cm. After each fold you should turn the dough 90 degrees before rolling again. The open ‘end’ of the dough should be towards you every time when rolling out the dough.at around 3:40 minutes). After the second turn, again give it a 30 minute rest in the fridge. After the third turn you leave the dough in the fridge overnight until day 3, the actual croissant making day! Dividing the dough Take the dough from the fridge. Lightly flour your work surface. Now very gently roll the dough into a long and narrow strip of 20 cm x 110 cm. If the dough starts to resist too much or shrink back during this process you can fold it in thirds and give it a rest in the fridge for 10 to 20 minutes before continuing. Do not fight the dough, when the dough refuses to get any longer, rest it in the fridge! It is such a shame to ruin two days of work. When your dough has reached its intended shape, carefully lift it a few centimeters to allow it to naturally shrink back from both sides. This way it will not shrink when you cut it. Your strip of dough should be long enough to allow you to trim the ends to make them straight and still be left with a length of about 100 cm. Shaping the croissants For the next stage you will need a tape measure and a pizza wheel. Lay a tape measure along the top of the dough. With the wheel you mark the top of the dough at 12,5 cm intervals along the length (7 marks total). Now lay the tape measure along the bottom of the dough and make a mark at 6,25 cm. Then continue to make marks at 12,5 cm intervals from this point (8 marks total). So the bottom and the top marks do not align with each other and form the basis for your triangles. Now make diagonal cuts starting from the top corner cutting down to the first bottom mark. Make diagonal cuts along the entire length of the dough. Then change the angle and make cuts from the other top corner to the bottom mark to create triangles. Again repeat this along the length of the dough. This way you will end up with 15 triangles and a few end pieces of dough Using your pizza wheel, make 1.5 cm long notches in the center of the short side of each dough triangle. Now very gently elongate each triangle to about 25 cm. This is often done by hand, but we have found that elongating with a rolling pin, very carefully, almost without putting pressure on the dough triangle, works better for us. You can try both methods and see what you think gives the best result. After you cut a notch in the middle of the short end of the triangle, try and roll the two wings by moving your hands outwards from the center, creating the desired shape with a thinner, longer point. Also try and roll the dough very tightly at the beginning and put enough pressure on the dough to make the layers stick together Proofing and baking Arrange the shaped croissants on baking sheets, making sure to keep enough space between them so they will not touch when proofing and baking. Combine the egg with a teaspoon of water and whisk until smooth. Give the croissants their first thin coating of egg wash. Proof the croissants draft-free at an ideal temperature of 24ºC to 26.5ºC (above that temperature there is a big chance butter will leak out!). use stone oven as a croissant proofing cabinet by preheating it for a minute to 25ºC It retains this temperature for a long time because of the oven stones and isolation. The proofing should take about 2 hours. You should be able to tell if they are ready by carefully shaking the baking sheet and see if the croissants slightly wiggle. You should also be able to see the layers of dough when looking at your croissants from the side.

Croissant INBP
in a dough mixer, mix all the ingredients and knead until you get a fairly soft, non-sticky dough. Put into a ball, film the salad bowl and let stand at room temperature for 15h. Realization of the crescent In a bowl, combine the flours, salt and sugar. Dig a well: put the crumbled yeast, the cold milk and the fermented dough in pieces. Mix by mixing for 5 minutes and then kneading for ten minutes until the dough, hard and firm at the beginning of the kneading becomes more supple and homogeneous. Divide into 2 pieces of the same weight (for ease). Reserve 1 fresh pate. Roll down the dough on a silicone mat or a sheet of parchment paper. to form a square of 25x25cm. Put in the freezer 15min. Meanwhile, take the butter out of the refrigerator, place it between 2 sheets of parchment paper and lower it in a square 1cm thick by hammering regularly with the rolling pin. Reserve cool. Tourage Remove the tempera from the freezer and the butter from the refrigerator. On a lightly floured work surface, place the square of tempera and place the square of butter on top in the diamond position. Close the tempera on top to embed it completely and return to closure against the work plan. Roll out the rolling pin as regularly as possible and form a rectangle of 45x15cm (best to spread regularly: put the roll in the center of the dough, spread from the center upwards then from the center downwards). Bring each end to the center of the rectangle, leaving a space of 1cm and fold (double turn). Turn the dough a quarter of a turn (opening in front of you). Be sure to remove excess flour regularly with a brush or brush. Spread again in rectangle always 3 times longer than wide and perform another double turn or single turn (the dough is folded into 3 equal parts as a wallet). Wrap the dough in food film and let it cool for at least 15min (we can leave the dough 3 or 4h without problem). Proceed in the same way with the other half of tempera. Expanded croissants On the floured work surface, roll down the puff pastry to form a 50x40cm rectangle. Cut in 2 in the direction of the width (2 strips of 25x60cm). Cut into triangles 25cm high and 10cm base (6 at the top, 6 at the bottom). Make a small 1 cm incision at the base of the triangle to facilitate shaping. Roll the dough from base to tip without overtightening. Place croissants tip stuck on a baking sheet lined with parchment paper. To brown with the whole egg beaten with a pinch of salt being careful not to make it run on the sides (night prooffing). Let rise for 2 hours at 26 ° C. Gently brown the raised croissants and bake in preheated oven at200℃ for about 20min Lower the dough into a rectangle of 24x40cm. Cut in 2 in the direction of the width (2 strips of 12x40cm), then in 5 in the direction of the length. Place a chocolate bar 5cm from the end, fold the top of the dough over, add another chocolate bar at the fold and fold and roll the dough. Lay the "chocolate buns" fold underneath on the jacketed plate. Brown and proceed as for croissants.

Croissant with gruau flour
Dissolve salt in water, yeast in warm milk 45°C. Prepare the hazelnut butter at 145℃. Put the water and salt in the bottom of the vat, then the flour, sugar and cold butter. Finally milk with yeast. Fraser, knead 10 minutes in 2nd speed with the beater. Beat and cover with plastic, mark for 1 hour at room temperature 22-25℃. Cast off, then film and leave one night in a cold room. Roll out the dough, then put half of the butter plate on 2/3 of the surface. Fold in 3 (not buttered side to fold over the butter, then the other part on top). Give a simple trick. Leave 30 minutes in a cold room. Spread, repeat this operation (butter to 2/3 of the surface, then fold in 3. Give a simple turn). Leave to relax in a cold room for about 1 hour. Reduce to 3.5 mm thick. Cut out triangles of 10 × 25 cm. Slightly lengthen the dough, shape roll without tightening. Place on a baking sheet, let 25°C at 90-95% humidity for 2 hours.

Croissant Dough Rich Dough
For the frasage, knead all the ingredients except for the butters in a dough mixer for 2 min in first speed, then add the cold butter cut in small cubes and continue to knead 8 min in the second speed. Pastry temperature 24 ° C Pointing 30 min at laboratory temperature. Tighten the dough and pass it 45 minutes in the freezer and finally in the refrigerator at 4 ° C throughout the night. The next day, spread the dough in the rolling mill to give the size of 60 x 40 cm and the place on a cold plate for 10 minutes in the deep freezer. Roll out the butter at half the size of the dough, place it on the tempera and close. Give a wallet 3/4 length, lengthen slightly and place in the refrigerator. Spread again, then give a simple turn, lower to the size of the plate and place cold again. To lengthen the dough 3 mm on the rolling mill, on a width of 35 cm, well relax the dough and cut the croissants on a base of triangle of 7 cm. Roll up the croissants, let it grow for 2 hours at 24/25 ° C, brown at brush and bake at 170 ° C for about 20 min. Size of the crescent: triangle of 8 x 35 cm, thickness: 3 mm, weight: 70 g.

croissant classic
Making the croissant dough We usually do this part in the evening. Combine the dough ingredients and knead for 3 minutes, at low to medium speed, until the dough comes together and you’ve reached the stage of low to moderate gluten development. You do not want too much gluten development because you will struggle with the dough fighting back during laminating. Shape the dough like a disc, not a ball, before you refrigerate it, so it will be easier to roll it into a square shape the following day. Place the disc on a plate, cover with clingfilm and leave in the fridge overnight. Laminating the dough Cut the cold butter (directly from the fridge) lengthwise into 1,25 cm thick slabs. Arrange the pieces of butter on waxed paper to form a square of about 15 cm x 15 cm. Cover the butter with another layer of waxed paper and with a rolling pin pound butter until it’s about 19 cm x 19 cm. Trim / straighten the edges of the butter and put the trimmings on top of the square. Now pound lightly until you have a final square of 17 cm x 17 cm. Wrap in paper and refrigerate the butter slab until needed. ake the dough out of the fridge. With a rolling pin roll out the dough disc into a 26 cm x 26 cm square. Try to get the square as perfect as possible and with an even thickness. Get the slab of butter from the fridge. Place the dough square so one of the sides of the square is facing you and place the butter slab on it with a 45 degree angle to the dough so a point of the butter square is facing you. Fold a flap of dough over the butter, so the point of the dough reaches the center of the butter. Do the same with the three other flaps. The edges of the dough flaps should slightly overlap to fully enclose the butter. With the palm of your hand lightly press the edges to seal the seams. Now the dough with the sealed in butter needs to be rolled out. With a lightly floured rolling pin start rolling out, on a lightly flour dusted surface, the dough to a rectangle of 20 x 60 cm. Start rolling from the center of the dough towards the edges, and not from one side of the dough all the way to the other side. This technique helps you to keep the dough at an even thickness. You can also rotate your dough 180 degrees to keep it more even, because you tend to use more pressure when rolling away from you than towards yourself. You can use these techniques during all the rolling steps of this recipe. Aim at lengthening the dough instead of making it wider and try to keep all edges as straight as possible. Fold the dough letter style, cover with clingfilm and refrigerate for 30 minutes (fold one third of the dough on top of itself and then fold the other side over it). Repeat the rolling and folding two more times (ending up with 27 layers of butter in total), each time rolling until the dough is about 20 cm x 60 cm. After each fold you should turn the dough 90 degrees before rolling again. The open ‘end’ of the dough should be towards you every time when rolling out the dough.at around 3:40 minutes). After the second turn, again give it a 30 minute rest in the fridge. After the third turn you leave the dough in the fridge overnight until day 3, the actual croissant making day! Dividing the dough Take the dough from the fridge. Lightly flour your work surface. Now very gently roll the dough into a long and narrow strip of 20 cm x 110 cm. If the dough starts to resist too much or shrink back during this process you can fold it in thirds and give it a rest in the fridge for 10 to 20 minutes before continuing. Do not fight the dough, when the dough refuses to get any longer, rest it in the fridge! It is such a shame to ruin two days of work. When your dough has reached its intended shape, carefully lift it a few centimeters to allow it to naturally shrink back from both sides. This way it will not shrink when you cut it. Your strip of dough should be long enough to allow you to trim the ends to make them straight and still be left with a length of about 100 cm. Shaping the croissants For the next stage you will need a tape measure and a pizza wheel. Lay a tape measure along the top of the dough. With the wheel you mark the top of the dough at 12,5 cm intervals along the length (7 marks total). Now lay the tape measure along the bottom of the dough and make a mark at 6,25 cm. Then continue to make marks at 12,5 cm intervals from this point (8 marks total). So the bottom and the top marks do not align with each other and form the basis for your triangles. Now make diagonal cuts starting from the top corner cutting down to the first bottom mark. Make diagonal cuts along the entire length of the dough. Then change the angle and make cuts from the other top corner to the bottom mark to create triangles. Again repeat this along the length of the dough. This way you will end up with 15 triangles and a few end pieces of dough Using your pizza wheel, make 1.5 cm long notches in the center of the short side of each dough triangle. Now very gently elongate each triangle to about 25 cm. This is often done by hand, but we have found that elongating with a rolling pin, very carefully, almost without putting pressure on the dough triangle, works better for us. You can try both methods and see what you think gives the best result. After you cut a notch in the middle of the short end of the triangle, try and roll the two wings by moving your hands outwards from the center, creating the desired shape with a thinner, longer point. Also try and roll the dough very tightly at the beginning and put enough pressure on the dough to make the layers stick together Proofing and baking Arrange the shaped croissants on baking sheets, making sure to keep enough space between them so they will not touch when proofing and baking. Combine the egg with a teaspoon of water and whisk until smooth. Give the croissants their first thin coating of egg wash. Proof the croissants draft-free at an ideal temperature of 24ºC to 26.5ºC (above that temperature there is a big chance butter will leak out!). use stone oven as a croissant proofing cabinet by preheating it for a minute to 25ºC It retains this temperature for a long time because of the oven stones and isolation. The proofing should take about 2 hours. You should be able to tell if they are ready by carefully shaking the baking sheet and see if the croissants slightly wiggle. You should also be able to see the layers of dough when looking at your croissants from the side.
